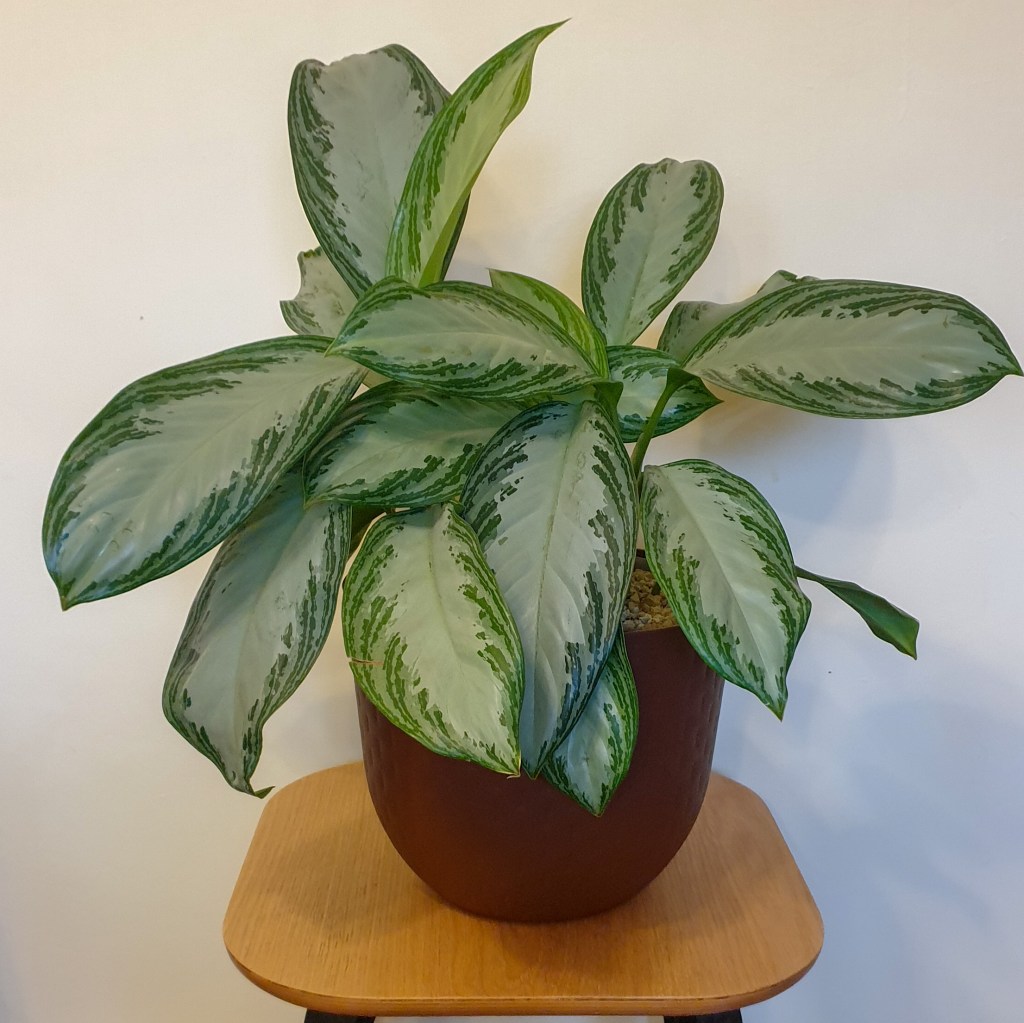
Vulcaponics is a hybrid growing system that blends soil and hydroculture methods, enhancing plant health through improved water management and root growth. It uses a substrate of pumice granules, providing easy watering and reducing pest risks. While suitable for small to medium plants, it has some weight and cost disadvantages.
Vulcaponics is the latest evolutionary step in interior landscaping and is becoming increasingly popular. If you are not familiar with the term, it is a growing system that combines the advantages of hydroculture with the convenience of soil culture. The system encourages good root growth, makes water and fertilizer management easier, reduces the risk of soil pests (especially fungus gnats) and helps the interior landscaping industry reduce its reliance on peat-based substrates.
So, what is a vulcaponic growing system?

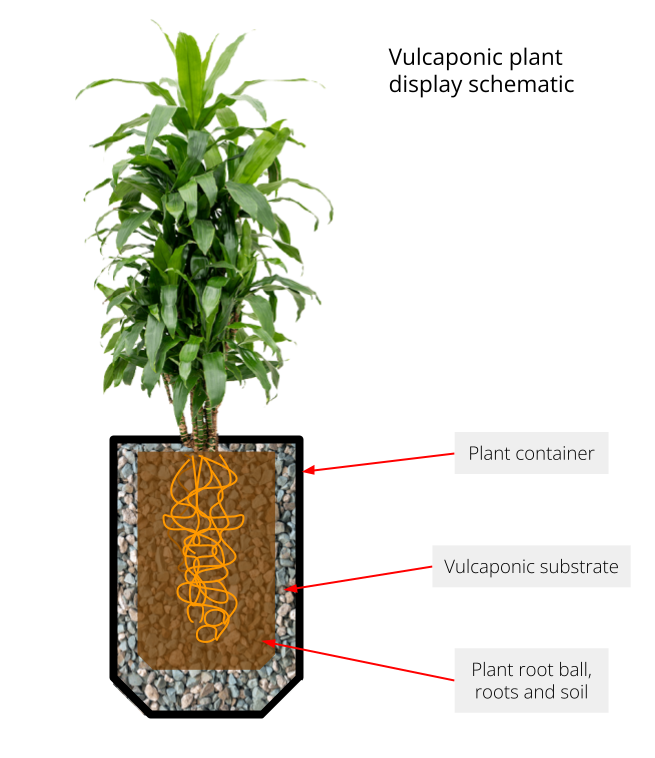
Vulcaponics is a hybrid growing system that combines the benefits of both soil and hydroculture systems. It is effectively a semi-hydro system: the plants start out as conventional soil-cultured plants growing in a lightweight compost but over the course of a few weeks, the roots grow into the vulcaponic substrate and behave more like the water roots that are found with hydroculture plants.
In many respects, the system is similar to the Seramis system that developed in the 1990s, and which encourages exceptional root growth. Seramis is composed of small granules of expanded, aerated clay (much smaller and denser than LECA, used in hydroculture plants), which are able to hold water and allow root hairs to penetrate them. If I remember correctly, the product was originally developed as a type of cat litter, but was soon found to be an exceptional substrate for indoor plants.
Vulcaponic substrate shares many of the same characteristics, but instead of being made from clay, is composed of fine granules of pumice (the result of volcanic activity – hence the name) and some other naturally-occurring minerals.
What are the benefits?
Vulcaponic systems have several benefits, and most relate to better root growth and root health due to improved water management.
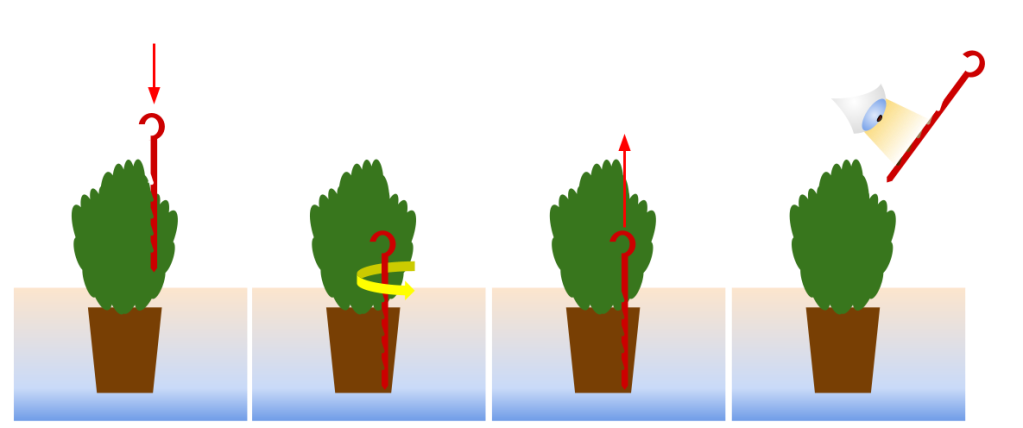
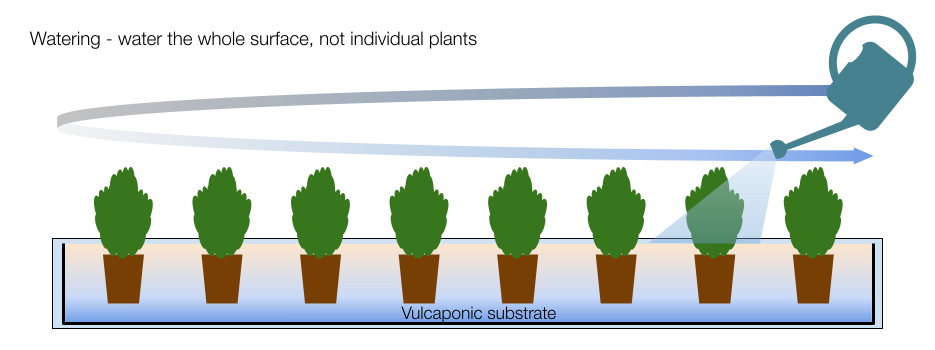
Watering a vulcaponic system is very easy – you check the soil moisture of the root ball (using a soil probe), and if it is dry, you add water. Sometimes, vulcaponic displays are fitted with a float gauge (the same as with a full hydroculture system), but it isn’t essential.
Water is added to substrate, which then percolates down the to the bottom. The water is then absorbed by the substrate, which can lift it as much as 20cm. This then creates a jacket of moisture right around the root ball which initially soaks into the soil. After a while, roots from the rootball will grow into the vulcaponic substrate and take water from there. This means that the rootball remains aerated and oxygen can get to the roots easily. It also means that the soil is not compacted as it often is when top-watered.
Delivering the water to the roots this way has another benefit – the soil surface remains dry. If the soil surface is dry, then fungus gnats (sciarid flies) have a hard time getting established. Furthermore, a vulcaponic display should include a 2 – 3cm deep layer on the surface as well as around the sides and underneath the rootball. This makes it even harder for soil-dwelling pests to establish.
Watering intervals can also be extended. My own experiments have shown that it is easily possible to extend watering intervals to as much as six weeks (depending on plant species). This means that interior landscapers can spend more time cleaning, grooming, trimming and pruning their plants (the interesting part of the job) and less time lugging heavy watering cans around and just having enough time to give the plants a quick drink. The ‘splash and dash’ approach to plant maintenance can be eliminated, resulting in higher quality, longer lasting plant displays. Commercial interior landscapers will have fewer customer complaints, fewer plant replacements and improved operating margins.
The downsides
Vulcaponics are not a panacea, but the system is ideal for small and medium-sized plants (up to about 2m in height). Really large plants are still better off in a decent soil-based compost. The main disadvantages are:
- Vulcaponic substrate is heavy, so you must ensure that any plant containers, or furniture that they are placed on, can take the extra weight.
- Compared with lightweight compost media, vulcaponic substrate can be pricey. However, the benefits outweigh the initial expense quite quickly
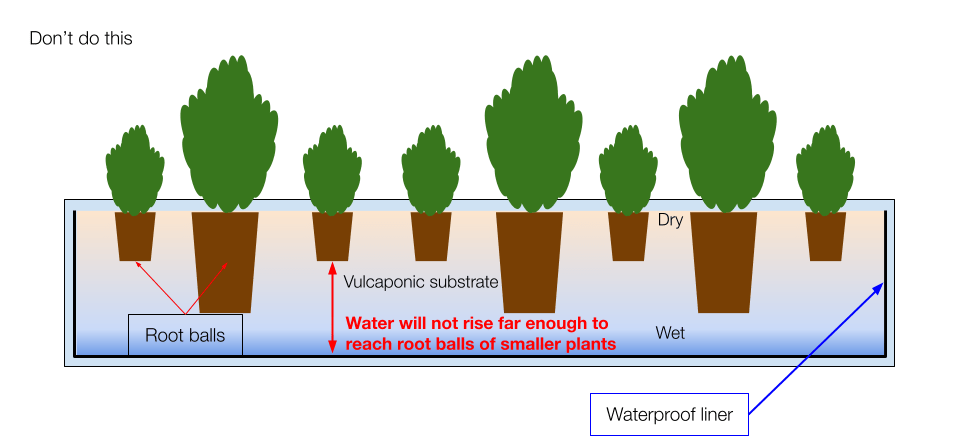
- When planting mixtures of plants in a large container, it is important to ensure that the plants have a similar rootball depth
- For deeper plant containers, you will have to use a liner – you don’t want more than 5 – 8cm depth of vulcaponic substrate under the rootball, otherwise the water will not rise far enough
Want to learn more?
If you are an interior landscaper interested in discovering more about vulcaponics, please get in touch. I’d be happy to discuss the system and I offer a training programme on this subject.


Leave a comment